Garrie AI: Your Cable Guide


How to Wire a GFCI Outlet
GFCI (Ground Fault Circuit Interrupter) outlets are required for electrical safety in bathrooms, kitchens, basements, garages, and other potentially wet areas. These devices quickly shut off power if they detect a ground fault to prevent electrical shocks.
Wiring GFCI differs from the way other outlets are wired. In this post, we'll cover two common GFCI wiring methods:
-
Wiring a single GFCI outlet
-
Wiring a GFCI outlet to protect multiple downstream outlets
Each method includes a diagram and step-by-step explanation to choose the right setup for your needs.
What You’ll Need
-
12/2 or 14/2 NM cable (Romex)
-
GFCI outlet
-
Screwdrivers
-
Voltage tester
-
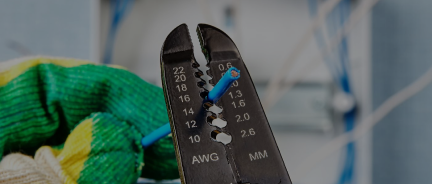
Wire strippers
-
Electrical tape
Always shut off the power at your main breaker panel and use a voltage tester to confirm wires are not live before working.
Method 1: Wiring a Single GFCI Outlet
This is the simplest and safest method. Power enters the box and connects directly to the LINE terminals on the GFCI outlet. No other outlets are connected, and the GFCI protects only itself.
Use This If:
-
You only need one GFCI outlet in the location.
-
There are no additional outlets to protect downstream.
Here is how to do it:
-
Connect the black (hot) and white (neutral) wires from the power source to the LINE terminals.
-
Leave the LOAD terminals empty.
-
Connect the bare copper ground wire to the green ground screw.
-
Do not connect anything to the LOAD terminals unless you intend to protect downstream outlets. Incorrect wiring here turns off GFCI protection.
Steps:
-
Turn off the power at the breaker and confirm it's off with a voltage tester.
-
Strip about 6–8 inches of sheathing from your 12/2 or 14/2 NM cable.
-
Connect the black (hot) wire to the brass screw labelled LINE (hot).
-
Connect the white (neutral) wire to the silver screw labelled LINE (neutral).
-
Connect bare copper (ground) wire to the green ground screw on the outlet.
-
Carefully fold wires into the box and screw the GFCI into place.
-
Restore power and test the GFCI using the TEST and RESET buttons.
Method 2: Wiring a GFCI Outlet With Downstream Protection
This setup lets you connect additional outlets to the GFCI’s LOAD terminals, so they’re protected by the same GFCI device.
Use This If:
-
You have standard outlets you want to protect downstream from the GFCI.
-
The GFCI is located at the beginning of the circuit.
Here is what you need to consider when selecting this model:
-
Power still enters through the LINE terminals.
-
The outgoing cable to other outlets connects to the LOAD terminals.
-
All outlets connected after the GFCI are now protected.
-
Don't reverse LINE and LOAD terminals. Doing so disables GFCI protection for downstream outlets.
-
If the GFCI trips and won’t reset, double-check for reversed wires or a ground fault.
-
If you're not 100% confident in your wiring, it's best to hire a licensed electrician.
-
Use a voltage tester to confirm the circuit is dead.
-
Test the GFCI after installation using the built-in TEST/RESET buttons.
-
Label LOAD and LINE wires clearly in the box to prevent wiring errors.
Steps:
-
Shut off power at the breaker and confirm it’s off.
-
Identify the incoming cable (from panel) and the outgoing cable (to other outlets).
-
Connect the incoming hot (black) wire to the brass LINE (hot) terminal.
-
Connect the incoming neutral (white) wire to the silver LINE (neutral) terminal.
-
Connect the outgoing hot (black) wire to the brass LOAD (hot) terminal.
-
Connect the outgoing neutral (white) wire to the silver LOAD (neutral) terminal.
-
Splice all ground wires together and pigtail to the outlet’s green ground screw.
-
Carefully fit the wires into the box, install the GFCI outlet, and restore power.
-
Test both the GFCI outlet and the downstream outlets to ensure they’re protected.
Here is the visual schema of both methods:

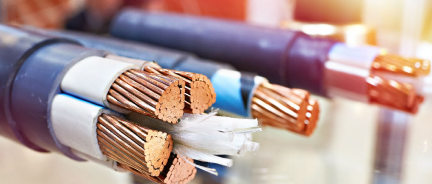
Types of Cable Used in GFCI Outlet Wiring
NM-B Romex is for indoor installations, while UF-B is used outdoors.
Used for 15-amp circuits in lighting and bathroom outlets.
-
12/2 NM-B Cable (Yellow jacket)
The most common choice for 20-amp outlets in kitchens, garages, laundry areas, and workshops.
-
12/3 NM-B Cable (Orange jacket)
Used where two hot wires share a single neutral (multi-wire branch circuits or switched outlets).
-
12/2 UF-B Cable (Gray jacket)
Rated for direct burial without conduit. Used for running power from the house to outdoor GFCI outlets or detached structures like sheds.
-
THHN or THWN Wires in Conduit
For exposed conduit runs indoors (e.g., garage walls) or outdoors. Run inside Schedule 40/80 PVC or EMT conduit.
When selecting the cable, make sure to follow these steps:
-
Match wire gauge to breaker size:
-
14 AWG = 15 amps
-
12 AWG = 20 amps
-
Always use outdoor-rated cable or conduit in wet, damp, or exposed areas.
-
Ground wire is always required, even though GFCIs don’t need it to function. It’s necessary to bond the outlet to the metal box and for code compliance.
Cables for GFCI wiring are available at Nassau National Cable.
Common Mistakes to Avoid (And How to Fix Them)
1. Mixing Up LINE and LOAD Terminals
The most common GFCI wiring error. Power from the breaker must be connected to the LINE terminals. If you mistakenly wire the power to the LOAD side, the outlet:
-
Will still deliver power
-
Won’t trip during a ground fault
-
Won’t protect downstream outlets
Fix:
Always check the labels on the back of the GFCI. Only connect the power source to the LINE. Connect downstream outlets to LOAD only if you want them protected.
2. Forgetting to Ground the Outlet
Although a GFCI can function without a ground, failing to bond the ground wire:
-
Exposes you to shock risk from metal boxes or faceplates
-
Can cause unreliable TEST button behavior
-
May fail inspection depending on local code
Fix:
Connect the bare copper or green wire to the outlet’s ground screw. Also ground the box if it's metal.
3. Using a GFCI Breaker and GFCI Outlet on the Same Circuit
This causes overlapping protection and leads to:
-
Nuisance tripping
-
Difficulty identifying which device tripped
-
No additional safety benefit
Fix:
Choose one: a GFCI outlet or a GFCI breaker, not both on the same branch circuit.
4. Not Testing the Outlet After Installation
GFCIs can be miswired and still deliver power. If you don’t test it, you won’t know if it actually trips during a fault.
Fix:
Always press the TEST button after restoring power. The outlet should shut off. Press RESET to restore power. Use a GFCI tester or lamp to verify function.
Frequently Asked Questions (FAQ)
Do I need a GFCI if I already have a grounded outlet?
Yes. Grounding reduces shock risk but does not interrupt the circuit during a fault. GFCIs shut off power immediately when a leak is detected.
Can I install a GFCI outlet without a ground wire?
Yes. NEC allows GFCIs on ungrounded circuits, but the outlet must be labeled “No Equipment Ground”
It will still provide shock protection through current imbalance detection.
Can I use one GFCI to protect multiple outlets?
Yes. Connect the additional outlets to the LOAD terminals. Make sure they are wired correctly and test them after installation.
Should I use both a GFCI breaker and a GFCI outlet on the same circuit?
No. It may cause nuisance tripping and is unnecessary. Choose either method , not both.
How often should I test a GFCI outlet?
Test the outlet:
-
Immediately after installation
-
Once a month using the TEST/RESET buttons
You can also use a GFCI tester for added confirmation.
Why does my new GFCI keep tripping even with no load connected?
Possible causes:
-
Moisture inside the box
-
Damaged cable or wiring
-
Shared neutral or ground fault
Inspect all connections, especially in outdoor boxes.
Can a GFCI be used on a 2-wire circuit without a neutral?
No. A GFCI requires both hot and neutral to function. If there’s no neutral wire, the GFCI will not work properly.