Garrie AI: Your Cable Guide


How to Solder Wires: A Quick Guide
Wire soldering is a process used to join two or more wires or a wire to a connector or terminal. This involves melting solder around the connection point. Solder is a filler material of metal alloy.
Unlike many other types of electrical work around the house, wire soldering requires only basic electrical skills, so homeowners can easily do it on their own while following safety measures. Once you master soldering, you can save small appliances like coffee makers from discarding once their electrical connections become broken. Soldering can be used for different electrical projects around the house, and it can also be a DIY hobby.
Below is a quick guide on how to teach yourself to solder wires:
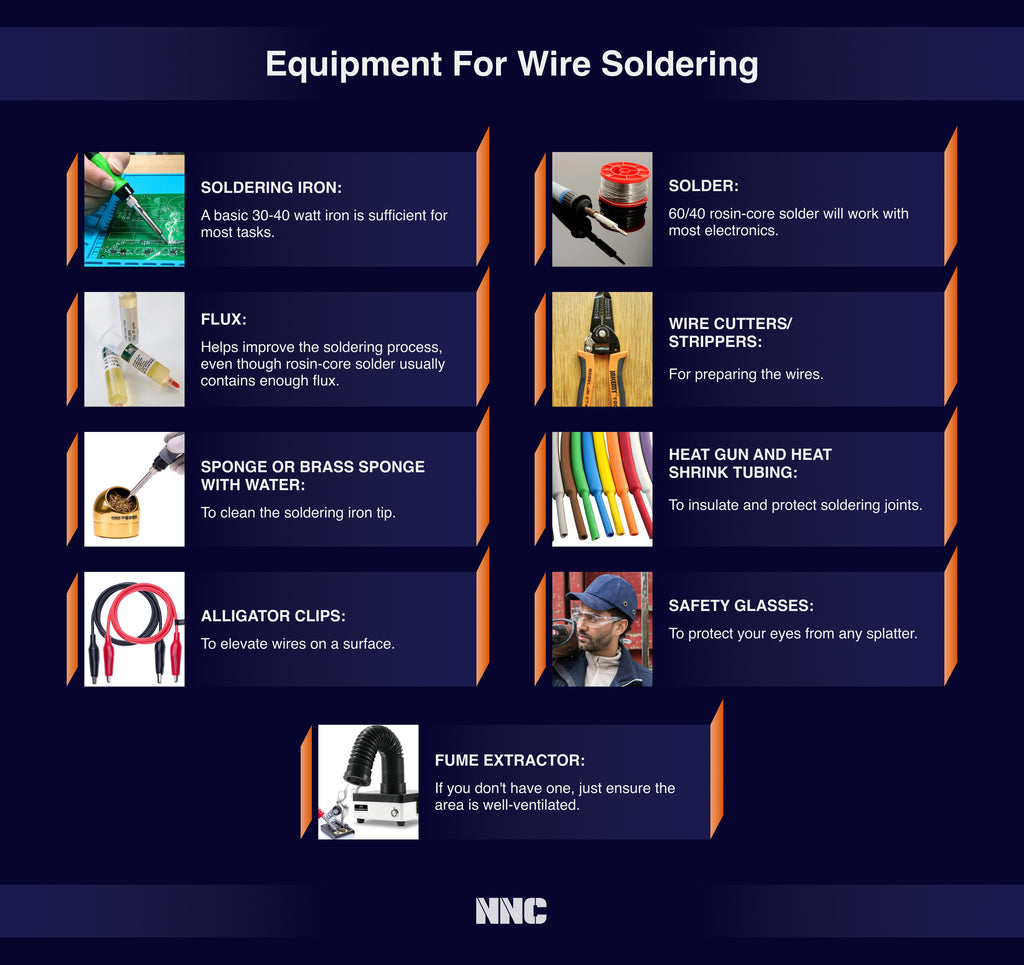
Equipment For Wire Soldering
- Soldering Iron: A basic 30-40 watt iron is sufficient for most tasks.
- Solder: 60/40 rosin-core solder will work with most electronics.
- Flux helps improve the soldering process, even though rosin-core solder usually contains enough flux.
- Wire Cutters/Strippers: For preparing the wires.
- Sponge or Brass Sponge with Water: To clean the soldering iron tip.
- Heat Gun and Heat Shrink Tubing: To insulate and protect soldering joints.
- Alligator Clips: To elevate wires on a surface.
- Safety Glasses: To protect your eyes from any splatter.
- Fume extractor: If you don't have one, just ensure the area is well-ventilated.
Soldering Wires Step-By-Step
1. Prepare the workspace
- Ensure good ventilation.
- Heat up your soldering iron on a non-flammable surface.
- Clean the tip with a sponge or brass sponge.
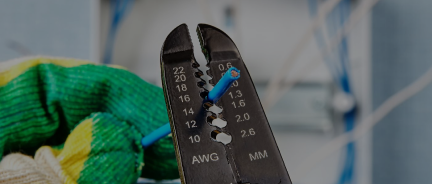
2. Strip the wires
- Use wire strippers to remove a small section of insulation from the ends of the wires you plan to solder. Usually, 1/2-inch is what you should aim for. Make sure you do not strip more or less than that, as it will hinder the process.
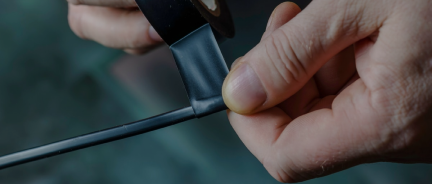
3. Add heat-shrink tubing
Coat the wire in heat-shrink tubing by slipping the tubing onto the wire and pulling. The tubing should fully cover the wire splice and an additional 1/2 inch on each end of the wire.
4. Tin the soldering iron
- Apply a small amount of solder to the iron’s tip. This is called 'tinning' and helps improve heat transfer.
5. Apply flux (if necessary)
- If your solder doesn’t have a flux core, apply a small amount of a resin material flux to the stripped ends of the wires. Even with the flux core, adding flux can be beneficial.
6. Join the wires and elevate them on a work surface
- Twist the stripped ends of the wires together. Make sure the connection is mechanically strong but not too tight before soldering. Elevate the wires with the help of alligator clips. Flux makes the soldering connection stronger and reduces oxidation.
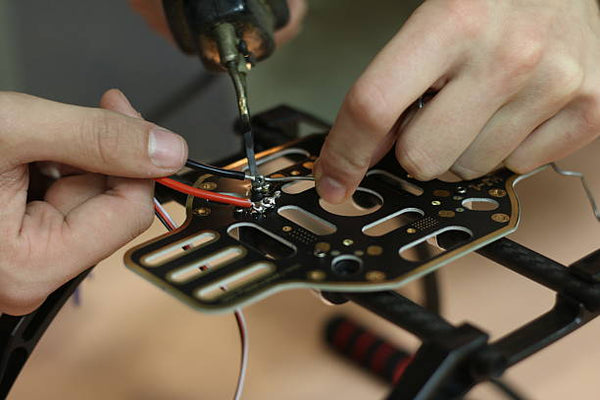
7. Solder the joint
- Touch the soldering iron to the joint to heat it, and then apply the solder directly to the wire, not the iron. The solder should flow smoothly around the joint. You should use around six inches of solder.
- Remove the iron and allow the solder to cool naturally without blowing on it.
8. Inspect the joint
- A good solder joint should be shiny and smooth.
- Ensure there’s no excess solder that could cause short circuits.
9. Shrink the tubing
- After soldering the joints, slip the heat shrinking tubing and use the heat gun to finish the process.
10. Clean and maintain your iron
- Clean the tip after use and re-tin it before turning off the iron.
Safety and Success Tips for Wire Soldering
- Do not overheat, as excessive heat can damage the wires or components. This is a common rookie mistake that disrupts the entire process.
- Use the right amount of solder. Too little won’t make a good connection; too much can cause shorts.
- If you solder small-sized wires, like 22-gauge ones, you should use a fine-tip soldering iron. Also, use a "helping hands" tool or tweezers to hold the wires in place and apply minimal solder to avoid excess.
- It’s worth practicing on spare wires to perfect your technique.
- Avoid inhaling fumes and work in a well-ventilated area.
- Be cautious around the hot iron.
- Wear safety glasses to protect your eyes from splashes of hot solder.
- Always ensure the surfaces to be soldered are clean.
- Use the right solder (usually rosin-core for electronics).
Bonus: How to Solder Wires to a Circuit Board
- Strip a small amount of insulation from the wire, tin the end.
- Place the tinned wire on the intended solder pad on the circuit board.
- Heat the wire and the pad simultaneously with the iron, then apply the solder until it flows around the connection.
How to Solder 2 Wires Together
- Twist the stripped ends of the wires together and tin them.
- Heat the twisted pair with the iron and apply the solder until it flows over the joint.
How to Solder Wire to Metal
- Clean the metal surface and the wire.
- Apply flux to both the wire and the metal surface.
- Heat the metal surface and then the wire. Apply solder to the junction point.
How to Solder Wires to Connectors
- Prepare the wire ends by stripping and tinning.
- Insert the tinned wire into the connector terminal.
- Apply heat and solder to the point where the wire meets the connector.