Garrie AI: Your Cable Guide


How to Wire a House: Complete Guide to Residential Wiring
Wiring a house is one of the most consequential decisions in any construction or renovation project. The way a house is wired also determines how easily the electrical system can handle future upgrades and modern power demands. Modern homes place greater electrical demands on circuits than houses built even 20 years ago.
This guide explains how house wiring works, what cable and conduit types are commonly used, how circuits are planned, where different wiring methods are allowed under the NEC, and what homeowners should understand before installation or inspection.
This guide covers everything homeowners, builders, and electricians need to know about residential wiring : from planning your electrical system to selecting the right wire types, running cables through walls, and passing inspections.
Understanding Residential Electrical Systems
A residential electrical system begins at the utility company's transformer and ends at your outlets, switches, and fixtures. Here's the path power takes from the street to your devices:
Service entrance → Meter → Main disconnect → Service panel (breaker box) → Branch circuits → Outlets, switches, and fixtures
Most modern homes run on a 120/240V, single-phase, 3-wire service. 120V circuits are used for standard outlets and lighting, while 240V circuits are for high-draw appliances such as electric ranges, dryers, and HVAC equipment.
Service size is measured in amperage. New single-family homes typically require a minimum 200-amp service, though larger homes or those with electric vehicles and whole-home appliances, such as central HVAC systems and backup generators, may benefit from 400-amp service.
Electrical Code and Permits
The National Electrical Code (NEC)
The NEC (NFPA 70) is the primary benchmark for safe electrical installation in the United States. The code is revised every three years, though states and local jurisdictions adopt different editions on their own timelines. While NEC 2023 is the latest edition, many jurisdictions still enforce NEC 2020 or NEC 2017.
Key NEC requirements for residential wiring include:
-
Arc-fault circuit interrupter (AFCI) protection in most living areas
-
Ground-fault circuit interrupter (GFCI) protection in wet locations
-
Tamper-resistant receptacles throughout
-
Specific outlet spacing requirements (every 12 feet along walls, every 6 feet in kitchens)
-
Dedicated circuits for kitchen appliances, laundry, and bathrooms
Permits and Inspections
Virtually all residential electrical work beyond simple device replacement requires a permit. Contact your local building department before starting. Permit fees vary but typically range from $50 to $500 depending on the scope of work.
Plan for at least two inspections:
-
Rough-in inspection is performed before drywall is installed, so the inspector can see all wiring runs
-
Final inspection is after devices, fixtures, and the panel are complete
Note: Skipping permits is not just illegal. It also creates liability issues when you sell the home, and can void your homeowner's insurance in the event of a fire.
Tools and Materials You'll Need
Essential Tools
-
Voltage tester (non-contact and multimeter)
-
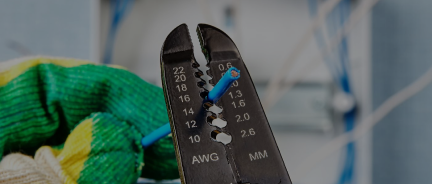
Wire stripper and cutter
-
Fish tape or fish sticks
-
Drill with long auger bits (5/8" and 1")
-
Reciprocating saw or oscillating multi-tool
-
Cable stapler or hammer and cable staples
-
Lineman's pliers and needle-nose pliers
-
Conduit bender (for exposed conduit runs)
-
Label maker
Materials
-
Wire and cable in appropriate gauges: NM-B for interior branch circuits, UF-B for direct-burial outdoor runs, THWN/THHN for conduit, SEU/SER for service entrance and interior feeders, URD for underground service laterals
-
Metal or plastic electrical boxes
-
Wire connectors (wire nuts or push-in connectors)
-
Cable staples and straps
-
Weatherproof boxes and covers (outdoor locations)
-
Circuit breakers
-
Electrical tape
Wire Types for Residential Wiring
NM-B Cable (Non-Metallic Sheathed Cable)
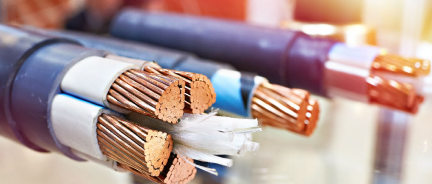
This is the standard for residential interior wiring. NM-B (commonly called Romex, a brand name) consists of two or more insulated conductors plus a bare copper ground wire, all wrapped in a PVC sheath. It's fast to install, inexpensive, and allowed in most interior dry locations.
-
14/2 NM-B — 15A circuits (general lighting and outlets)
-
12/2 NM-B — 20A circuits (kitchen, bath, outdoor)
-
10/2 NM-B — 30A circuits (electric dryers, water heaters)
-
6/3 or 8/3 NM-B — 40–50A circuits (ranges, subpanels)
The "/2" or "/3" refers to the number of current-carrying conductors (not counting the ground).
UF-B Cable (Underground Feeder)
UF-B cable is for outdoor wiring buried directly in the ground, such as outdoor lighting circuits and garden equipment. Unlike NM-B, it has a solid PVC jacket moulded directly around the conductors, making it moisture- and sunlight-resistant.
-
Minimum burial depth: 24 inches (or 6 inches under a conduit or concrete slab)
-
Approved for direct burial without conduit
-
Can also be used in wet locations and some outdoor exposed applications
THWN/THHN Wire
These are individual conductors run inside a conduit. They are used when conduit is required, such as in garages, unfinished basements, exposed exterior runs, or anywhere NM-B is not permitted. THWN-2 is dual-rated for both wet and dry locations. THWN/THHN is available with copper or aluminium conductors.
Service Entrance Cable (SEU/SER)
Service entrance cables deliver power from the utility connection or meter to distribution equipment, such as main panels and subpanels. SEU has two insulated conductors wrapped by a bare concentric neutral and is the standard choice for above-ground installations, such as overhead service drops, weatherhead-to-meter, and meter-to-panel. It is also used for older 3-wire range or dryer installations where permitted.
SER has three of our fully insulated conductors plus a bare ground inside a round outer jacket. It is the more popular of the two and is used for interior feeders: subpanel runs, electric range circuits, and dryer circuits, where a complete 4-wire assembly.
Aluminum Wiring
Aluminum is widely used for large-gauge residential applications: service entrance conductors, feeder runs to subpanels, and 240V appliance circuits. It's significantly less expensive than copper at large sizes: at 4/0 AWG and above, aluminum can cost 40–60% less than an equivalent copper conductor, making it the default choice for service entrance work throughout the industry.
Three rules that always apply to aluminum:
-
Never use aluminum for 15A or 20A branch circuits. Small-gauge aluminium has a documented fire-safety history due to its higher expansion and contraction at connections. Therefore, copper is mandatory for standard branch circuits.
-
Use only CO/ALR-rated or aluminum-rated terminations. Standard residential devices (outlets, switches, breaker lugs) may not be rated for aluminum. Panel lugs for large feeders are almost alway aluminum-rated; verify before terminating.
-
Apply antioxidant compound (Noalox or equivalent) to all aluminum terminations. Aluminum oxidizes quickly, and oxide film increases resistance at connections. Apply compound before inserting conductors into lugs.
Common residential aluminum wire applications include:
-
2 AWG aluminum URD is commonly used for 100A underground service laterals between the utility transformer and meter.
-
1/0 AWG aluminum URD is commonly used for 125A–150A underground laterals, while 1/0 AWG aluminum SEU or USE-2 is commonly used for 125A overhead service entrance conductors.
-
2/0 AWG aluminum SEU or USE-2 is commonly used for 150A overhead residential services.
-
4/0 AWG aluminum URD, SEU, or USE-2 is the standard choice for most modern 200A residential services.
-
350 kcmil aluminum SEU or URD conductors are commonly used in parallel sets for 400A residential services.
-
4 AWG aluminum THWN/XHHW installed in conduit is commonly used for 60A subpanel feeders, detached garages, workshops, HVAC equipment, and EV charger circuits.
-
1 AWG to 4/0 AWG aluminum THWN/XHHW conductors installed in conduit are commonly used for residential subpanel feeders ranging from 100A to 200A.
Practical note: For everything below 60A, including ranges, dryers, A/C units, and EV chargers, use only copper. The cost savings from short branch circuit runs don't justify the installation costs of aluminium. Aluminum pays off clearly on service entrance conductors and long feeder runs where the gauge is large and the run is long.
A Note on URD Cable
URD (Underground Residential Distribution) cable is the aluminum conductor used for underground service laterals, the segment that runs from the utility's transformer or pedestal to your meter base. It is aluminum, direct-burial rated, with XLPE insulation and a bare concentric neutral wrapped around the insulated phase conductors.
Key details:
-
2-wire URD (one insulated phase conductor + concentric neutral) is used for 120/240V single-phase residential service with a separately run neutral, or in some utility configurations
-
3-wire URD (two insulated phase conductors + concentric neutral) is the standard residential configuration, delivering 120/240V service in a single cable assembly
-
The concentric neutral doubles as both the neutral conductor and the cable's armor. It is a current-carrying conductor and must be sized accordingly
-
URD is rated for direct burial without conduit, though many utilities and local codes require conduit in the trench for protection and future replaceability
-
The homeowner's responsibility typically begins at the utility's pedestal or transformer secondary terminals and ends at the meter base; in most jurisdictions, the utility runs the cable from the transformer to the property line or pedestal. Confirm your utility's demarcation point before purchasing cable.
-
Burial depth: 24 inches minimum for direct-burial URD; 18 inches when installed in RMC or IMC conduit (verify with your utility, many require 36 inches regardless)
Wire Gauge and Ampacity in Residential Applications
Wire gauge determines how much current a conductor can safely carry. In the U.S., residential wire is measured in American Wire Gauge (AWG).
The table below covers all three conductor types used in a complete residential system. NM-B ampacity is based on the 60°C temperature rating required for residential terminals. THWN ampacity uses the 75°C column, which matches standard residential breaker and panel lugs. Aluminium is not recommended for branch circuits, so those columns are intentionally omitted for 14–2 AWG.

Voltage Drop
For long circuit runs (over 100 feet), voltage drop becomes a concern. The NEC recommends limiting voltage drop to 3% on branch circuits and 5% total from the service panel to the load. Long runs to outbuildings, pool equipment, or detached garages may require a larger gauge than ampacity alone demands.

Planning Your Electrical System
Good planning before rough-in begins saves enormous time and money.
Step 1: Create an Electrical Plan
Draw a floor plan and mark the location of every:
-
Outlet (and whether it needs to be a 20A circuit)
-
Switch and what it controls
-
Fixture (overhead lighting, ceiling fans, recessed lights)
-
Dedicated appliance circuit (dishwasher, microwave, refrigerator, etc.)
-
Special circuits (240V range, dryer, HVAC, EV charger)
Step 2: Group Circuits Logically
Each circuit on your panel serves a group of outlets, fixtures, or a dedicated appliance. General guidelines:
-
Bedroom and living room lighting: 15A, up to 8–10 devices per circuit
-
General-purpose outlets: 15A or 20A, no more than 8–10 per circuit
-
Kitchen small appliance circuits: Two dedicated 20A circuits minimum (NEC requirement)
-
Bathroom: One dedicated 20A circuit per bathroom (or one shared 20A circuit for multiple bathrooms, no other loads)
-
Laundry room: Dedicated 20A circuit for washer; separate 30A/240V for electric dryer
-
Garage: At least one dedicated 20A circuit
-
Outdoor outlets: Dedicated circuit recommended; GFCI protected
Step 3: Size Your Panel
A 200A panel with 30–40 spaces is standard for most new homes. Plan for:
-
One space per single-pole breaker (120V circuit)
-
Two spaces per double-pole breaker (240V circuit)
-
Tandem (duplex) breakers to increase capacity if needed
For large homes or those with multiple 240V loads, a 400A service with a main panel and a subpanel may be appropriate.
Rough-In Wiring: Room by Room
Rough-in wiring happens after framing is complete but before drywall. This is when you install boxes, drill holes, and run cable.
Box Installation
Box placement heights (measured to center, standard practice):
-
Outlets: 12–18 inches from finished floor
-
Switches: 48 inches from finished floor
-
Countertop outlets: 18 inches from countertop surface (or per local code)
Use old-work (remodel) boxes when adding to existing walls. Use new-work (nail-on) boxes in new construction.
Box fill calculations are required by NEC Article 314. Each conductor, device, and fitting counts toward the box's cubic inch rating. Single-gang plastic boxes run 18–22 cubic inches; metal boxes are available up to 30+ cubic inches for high-count applications.
Drilling Holes
Use a 5/8" or 1" spade bit or auger bit to drill through studs and plates. Holes should be:
-
Centered in the stud where possible (at least 1-1/4" from the edge per NEC)
-
Aligned horizontally so wires run straight
-
Fitted with nail plates where the wire is closer than 1-1/4" to the stud face
Room-Specific Requirements
Kitchen:
-
Two 20A small appliance circuits for countertop receptacles (required by NEC)
-
Dedicated 20A circuit for refrigerator (recommended; required in some jurisdictions)
-
Dedicated circuit for dishwasher
-
Dedicated circuit for disposal (or shared with dishwasher via split receptacle)
-
40–50A/240V circuit for electric range or cooktop
-
AFCI and GFCI protection throughout
Bathrooms:
-
Dedicated 20A circuit (no lighting or other loads on the same circuit)
-
GFCI protection on all receptacles
-
Exhaust fan circuit (can share with light or be separate)
Bedrooms:
-
AFCI protection is required on all circuits (NEC 2014 and later)
-
Ceiling fan wiring requires 3-wire cable (separate switch legs for fan and light)
Garage:
-
At least one 20A circuit
-
GFCI protection on all receptacles
-
Consider a dedicated circuit for a compressor or large tools
-
EV charger circuit: typically 50A/240V (for Level 2 charging)
Basement:
-
AFCI and GFCI protection per the current NEC
-
Sump pump on a dedicated circuit
-
Dehumidifier on a dedicated circuit (recommended)
Outdoors:
-
GFCI protection on all exterior receptacles
-
Weatherproof in-use covers (extra-duty)
-
Minimum one outlet at front and rear of house per NEC; recommend more
Running Wire Through Walls and Ceilings
Getting wire from the panel to each box is the most physically demanding part of residential wiring.
In New Construction
New construction is straightforward as the framing is open, and you simply drill through studs and run cable. Keep these practices in mind:
-
Staple NM-B cable within 12 inches of every box and every 4.5 feet along the run
-
Don't kink, crush, or overly bend the cable
-
Keep parallel runs neat and organized in the stud bay
-
Leave 6–8 inches of free conductor at every box
In Existing Construction (Fishing Wire)
Running wire through finished walls requires patience and the right tools.
Top-down fishing (through the attic): Often the fastest method. Access the top plates from the attic and drill down into the stud bay above the box location.
Bottom-up fishing (through the basement or crawlspace): Similar approach from below, drilling up through the bottom plates.
Wall fishing: For runs within a wall with no attic or basement access, use a fish tape or flexible drill bit to navigate through insulation and around fire blocking.
Common obstacles:
-
Fire blocking (horizontal 2x4s mid-wall): requires drilling through them
-
Insulated walls: use a fish rod system or stiff fish tape
-
Tile walls: avoid if possible; consider running in conduit on the surface instead
Installing the Service Panel
The main panel is the heart of your electrical system. Unless you're a licensed electrician, the utility company's side of the panel (above the main breaker) must be handled by a professional.
Panel Location
-
Indoor, dry location (garage, utility room basement)
-
Clear working space: 30" wide × 36" deep × 6'8" high (NEC 110.26)
-
Not in bathrooms, clothes closets, or over stairs
Wiring the Panel
-
Install the panel enclosure and mount it to the wall.
-
Run the service entrance conductors (handled by the electrician/utility)
-
Connect the main bonding jumper (neutral bar to enclosure)
-
Install the ground bar and connect the grounding electrode system.
-
Install branch circuit breakers.
-
Connect hot conductors (black/red) to breaker terminals.
-
Connect neutral conductors (white) to the neutral bar.
-
Connect ground conductors (bare or green) to the ground bar.
-
Label every breaker (required by NEC and invaluable for future maintenance).
Grounding and Bonding
Grounding protects people and equipment by providing a safe fault current path. Bonding ensures all metallic components are at the same electrical potential.
Grounding Electrode System
NEC requires connecting the panel to at least one grounding electrode:
-
Ground rods: Two 8-foot copper-clad rods, spaced at least 6 feet apart (most common residential method)
-
Concrete-encased electrode (Ufer ground): A 20-foot #4 AWG bare copper conductor embedded in the foundation — highly effective and required in many new construction jurisdictions
-
Water pipe: A metallic cold water pipe can supplement but not serve as the sole electrode in most cases
Equipment Grounding
Every outlet, switch, and fixture must be connected to the equipment grounding conductor (bare copper or green wire).
AFCI and GFCI Protection
These two technologies prevent the leading causes of electrical fires and electrocutions.
GFCI (Ground-Fault Circuit Interrupter
GFCIs detect current leaking to ground, even as little as 5 milliamperes, and trip within 1/40th of a second. Required locations under NEC 2023 include:
-
All bathroom receptacles
-
All kitchen countertop receptacles within 6 feet of a sink
-
All garage receptacles
-
All outdoor receptacles
-
Crawl spaces, unfinished basements
-
Boathouses, pool/spa areas
-
Receptacles within 6 feet of laundry and utility sinks
GFCI protection can be provided by a GFCI receptacle (protecting itself and downstream outlets on the same circuit) or a GFCI breaker (protecting the entire circuit).
AFCI (Arc-Fault Circuit Interrupter)
AFCIs detect electrical arcing, which causes roughly 30,000 home fires annually. Under NEC 2023, AFCI protection is required in virtually all living areas of the home, including:
-
All bedrooms
-
Family rooms, living rooms, dining rooms
-
Kitchens and laundry areas
-
Hallways and closets
AFCI breakers are installed at the panel. Du l-function AFCI/GFCI breakers provide both protections in a single device, significantly simplifying compliance.
Final Wiring and Device Installation
Once the rough-in is inspected and the drywall is complete, it's time to install devices and fixtures.
Trimming Out
-
Pull conductors out of each box, strip insulation, and identify hot, neutral, and ground
-
Install receptacles: Black (hot) to brass terminal, white (neutral) to silver terminal, bare (ground) to green screw
-
Install switches: Hot wire is interrupted; white wire used as a switch leg should be re-marked with black tape at both ends
-
Connect ceiling fans: Use the separate blue wire for the light kit if running a 3-wire cable with separate switch legs
-
Install light fixtures: Match wire colors and secure with wire nuts
Torque Requirements
NEC 110.14(D) requires torquing terminals to manufacturer specifications. Use a torque screwdriver for:
-
Breaker terminals
-
Panel lugs
-
Large-gauge connections
Inspection and Testing
Before Final Inspection
Use a non-contact voltage tester and multimeter to verify:
-
Correct voltage at each outlet (120V ± 5%)
-
No reversed polarity (hot and neutral swapped)
-
Continuity of ground at every receptacle
-
GFCI devices trip and reset correctly
-
All breakers are labeled
Outlet Tester
A simple plug-in outlet tester ($10–$15) confirms correct wiring at every receptacle in seconds. It detects open ground, reversed polarity, open neutral, and open hot conditions.
Passing Inspection
Inspectors commonly cite:
-
Missing nail plates on studs
-
Improper box fill (too many conductors in a box)
-
Missing cable staples or improper stapling
-
Exposed conductor at box entry
-
Incorrect wire gauge for breaker size
-
Missing AFCI/GFCI protection
-
Improperly labeled panel
Common Mistakes to Avoid
-
Undersizing wire gauge. For example, 14 AWG wire cannot be used on a 20A breaker.
-
Reversing polarity. Swapping hot and neutral conductors creates shock hazards even if the device appears to work normally.
-
Overloading circuits. Continuous loads should not exceed 80% of circuit ampacity.
-
Skipping AFCI or GFCI protection where required by code.
-
Leaving conductors too short inside boxes. The NEC requires at least 6 inches of free conductor for device termination and splicing.
-
Making splices outside listed junction boxes.
-
Ignoring conduit fill derating. Four or more current-carrying conductors in conduit require ampacity derating.
-
Ignoring voltage drop on long runs to garages, sheds, pools, or outdoor lighting. Long runs may require upsized conductors.
The quality of your wire and cable directly affects the safety and longevity of your electrical system. Choose conductors rated for their application: NM-B for dry interior runs, UF-B for direct burial, and THWN-2 in conduit, and buy from suppliers who can verify the specification and the origin of the cables.
Need wire and cable for a residential project? Nassau National Cable supplies NM-B, UF-B, THWN/THHN, SEU, SER, URD, and aluminum building wire in contractor quantities, with no minimum order requirements. Contact us for bulk pricing on large projects.