
¿Cómo cablear un subpanel?
¿Cómo cablear un subpanel?

El cableado de un subpanel es una tarea eléctrica común para cualquier propietario. Este blog le ayudará a cablear un subpanel y a seleccionar los mejores cables para este fin según el tipo, calibre, capacidad de corriente, conductor y presupuesto.
¿Qué es un subpanel?
La definición de subpanel se encuentra en el NEC, donde se le conoce como panel pequeño. Se trata de un panel de interruptores automáticos derivado del principal con la ayuda de dos interruptores automáticos estándar.
El subpanel cumple básicamente las mismas funciones que el panel principal, con la única diferencia de escala. Se utilizan principalmente cuando los paneles principales ya no tienen espacio para interruptores automáticos adicionales, lo que, siendo sinceros, ocurre en la mayoría de las casas de más de dos dormitorios. Los subpaneles ayudan a aliviar la carga del circuito eléctrico principal, previenen sobrecargas, protegen contra incidentes eléctricos y añaden más interruptores automáticos en una zona específica del edificio.
Un subpanel se alimenta a través de un disyuntor de 240 voltios desde el panel principal. No debe confundirse con el segundo o tercer panel principal del edificio, que se alimenta por separado. Para su alimentación, el subpanel utiliza dos barras de bus de corriente del panel principal. También cuenta con una barra de bus de tierra independiente, que facilita la separación entre neutro y tierra.
¿Qué tipo de cable utilizar al cablear un subpanel?
Cuando se trata de cablear un subpanel, hay muchos tipos de cables adecuados para elegir.
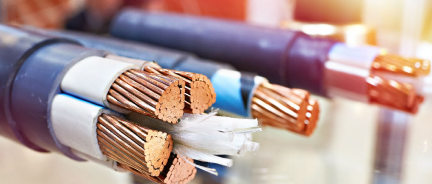
La principal recomendación para los subpaneles es elegir un cable de cobre de 600 V. Sin embargo, aunque el cobre funciona mejor en aplicaciones domésticas, muchos aún utilizan cables de aluminio para el cableado de las casas porque ayudan a ahorrar costos en un proyecto eléctrico (en promedio, el ahorro asciende a $200-$300 por subpanel).
Normalmente, necesitará un cable de 4 hilos con neutro separado del cable de tierra. El calibre del cable depende de la corriente máxima esperada, que se muestra en la tabla a continuación:

Los tipos comunes de cables utilizados en subpaneles son:
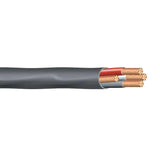
Cable SER
El cable SER para entrada de servicio es una opción muy popular para subpaneles. Al fin y al cabo, los subpaneles son una de las principales aplicaciones de este cable. El SER es una opción económica que cumple su función de forma excepcional. No requiere conductos, ni siquiera en exteriores. El SER está disponible con conductores de cobre y aluminio. No es apto para enterramiento directo y no puede utilizarse bajo tierra.
Cable THHN
El THHN es una opción ampliamente disponible que funciona bien en la mayoría de los subpaneles. Sin embargo, debe usarse en conductos. Funciona tanto en interiores como en exteriores. Se instala fácilmente. Disponible en versiones de cobre y aluminio. Puede usarse en conductos subterráneos.
Cable XHHW
Como en la mayoría de las aplicaciones, el XHHW en un subpanel es una alternativa más costosa y de mayor calidad que el THHN. Al igual que este último, debe usarse en conductos. Disponible en versiones de cobre y aluminio, puede usarse en conductos subterráneos.
Cable NM-B
Otra opción muy popular. Dado que el cable con revestimiento no metálico es un cable para interiores, solo funciona con paneles interiores. El Código Eléctrico Nacional prohíbe el uso del cable NM-B en exteriores. El cable NM-B solo está disponible con conductor de cobre.
Los cables de alimentación MHF para casas móviles y los cables URD no son la mejor opción para cablear un subpanel. Si ha decidido usar aluminio, las mejores opciones son los cables de aluminio SE, THHN o XHHW. Los cables MHF y URD no funcionan por diversas razones. Los URD sin doble clasificación no pueden entrar al edificio. Tampoco tienen cable neutro. Si bien se permite el uso de cables MHF en interiores, no cuentan con el cableado óptimo para su uso en subpaneles.
Un ejemplo de la instalación de un subpanel
El ejemplo propuesto utiliza un subpanel de 60 A para 120 V/240 V. El interruptor se alimenta de los dos cables de fase del panel principal. Los cables neutro y de tierra del subpanel principal se conectan a los terminales de neutro y tierra del subpanel.

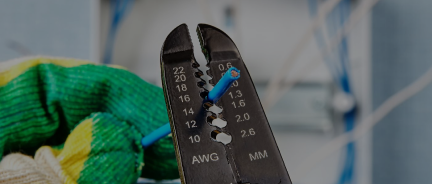
El cableado de un subpanel requiere conocimientos de electricidad y no puede ser realizado por un principiante por razones de seguridad y económicas. Para completar el proceso, necesitará un juego de herramientas, como un destornillador, un martillo, un voltímetro, una linterna, un pelacables y alicates. Además, necesitará el subpanel, tornillos de montaje, cables, interruptores de alimentación, disyuntores y abrazaderas.
Pasos del cableado del subpanel
- Montaje. El subpanel debe ubicarse aproximadamente a 30 cm del panel principal.
- Planificación de rutas para dos cables de corriente, uno de tierra y uno neutro. Asegúrese de que los cables estén enrutados de forma ordenada, ya que facilita enormemente el mantenimiento posterior. Un cableado desordenado puede causar problemas en el futuro.
- Pelado de cables con corriente y conexión a los interruptores de tierra. Para finalizar este proceso se utilizan abrazaderas.
- Conexión de cables con corriente a barras colectoras con corriente. Los cables se cortan y pelan durante este proceso.
- Conexión de los cables neutro y de tierra a sus terminales correspondientes. Corte y pele los cables según corresponda. Asegúrese de que los cables estén bien tensos en esta etapa.
- Conexión de todos los cables y acabado.