
How to Wire a Garbage Disposal?
Garbage disposals are connected in two ways: hardwired directly into a dedicated circuit, or wired with appliance cords plugged into wall outlets.
If the garbage disposal is hardwired, it is connected to a switch in an electrical box. Exposed wiring in the sink cabinet should be protected by conduit, even if it is NM-B Romex rarely out in conduit in other situations.
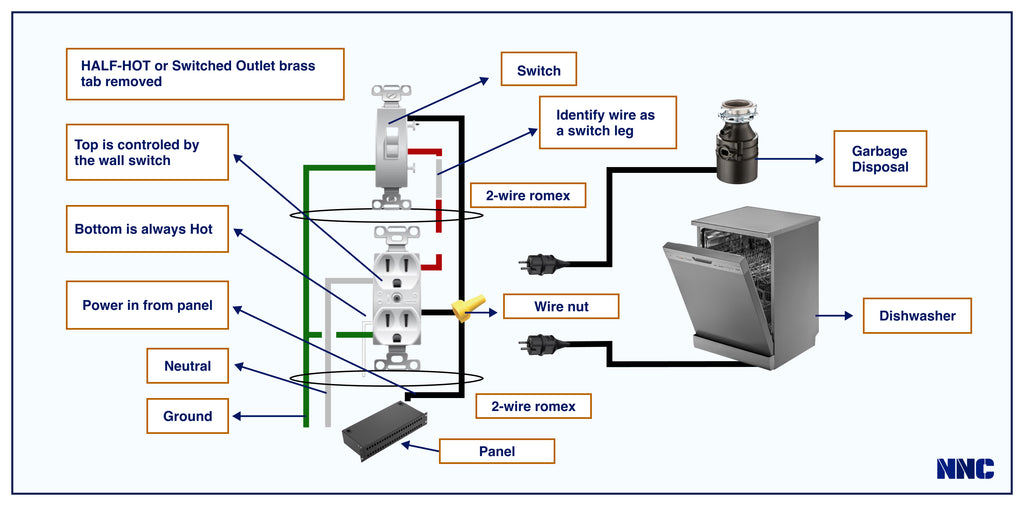
If the disposal uses a plug-in mechanism, it plugs into an outlet located in a sink cabinet controlled by a wall switch. In many cases, this outlet is wired as a switch receptacle, with one-half of the outlet controlled by a switch, and the other half is used to feed a related appliance, like a dishwasher.
Usually, power cords and cables used with garbage disposals are purchased separately.

Let's look into ways to power garbage disposal:
Step-by-step Guide To Wiring Garbage Disposal
Tools and materials:
- Screwdrivers: A set of flathead and Phillips screwdrivers for opening the electrical cover plate on the disposal and tightening connections.
- Adjustable Wrench: Useful for turning nuts and bolts, especially when working on plumbing connections.
- Plumber's Putty: Essential for creating a watertight seal between the sink and the disposal flange.
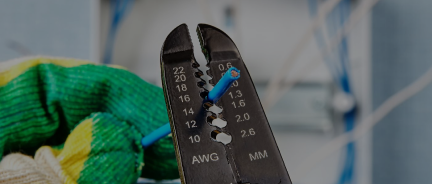
- Wire Strippers: For stripping the insulation off electrical wires.
- Voltage Tester: To ensure power is off before starting any electrical work.
- Pliers: Needle-nose pliers can help bend wires and reach into tight spaces. Channel-lock pliers are useful for plumbing connections.
- Wire Nuts: For securing wire connections safely.
- Electrical Tape: To insulate wire connections after using wire nuts.
- Pipe Wrench or Plumber’s Wrench: For tightening and adjusting plumbing pipes and fittings.
- Hacksaw or PVC Cutter: If you need to cut through any pipes or the discharge tube.
- Tape Measure: For measuring spaces and alignment.
- Power Cord Kit (for plug-in disposals): You'll need to purchase one if your disposal doesn’t come with a power cord. Make sure it's rated for the disposal's amperage.
- GFCI Outlet: If you’re planning to plug in your disposal, it’s recommended (and often required by code) to have it powered via a Ground-Fault Circuit Interrupter (GFCI) outlet for safety.
- Cable Clamp or Strain Relief: For securing the power cord or electrical wiring to the disposal unit.
- Non-Metallic (NM) Cable or Flexible Metal Conduit: For hardwired installations, depending on local codes and your preference.
- Junction Box: If you’re doing a hardwired installation and must make wire connections outside the disposal itself.
- Safety Glasses: To protect your eyes from debris, especially while cutting or drilling.
- Gloves: To protect your hands during the installation process.
1. Prepare:
- Ensure the power is off by turning off the circuit breaker or removing the fuse at the electrical panel.
- Verify power is off using a voltage tester at the disposal's electrical box.
2. Access the electrical wiring:
- Open the electrical cover plate on the bottom of the garbage disposal unit to access the wiring area. You will need to remove the compartment cover with the screw.
3. Prepare the wires:
- If your disposal is new, it might have a cord that needs to be installed. If it's a replacement, you can use the existing power cord.
- Strip the insulation from the wires (usually black, white, and green or bare for ground) about half an inch from the end to expose the copper.
Hardwired Installation
4. Connect to a power source:
- Direct wiring: With hardwired connections, the disposal's wires are connected directly to your home's electrical system. This involves connecting the black wire from the disposal to the black (hot) wire from the house, the white (neutral) disposal wire to the white home wire, and the green or bare (ground) wire to the home's ground wire. You can split direct wire to a dishwasher to handle garbage disposal as long as they are 120 VAC.
5. Electrical Connection to the Power Source:
- Secure to junction box: After making the wire connections with wire nuts, the wires are folded and tucked into the disposal's electrical box or a junction box in the wall or cabinet, and the cover plate is secured.
Plug-In Installation
5. Prepare the wires:
- Install the cord clamp: Place the cord clamp into a hole near the wiring compartment and secure it inside the plate with a wired nut.
- Install power cord (if applicable): If the disposal doesn't come with a power cord, you must attach one. This involves connecting the cord's black wire to the disposal's black wire, white to white, and the green wire to the disposal's ground screw.
6. Connect the power cord:
- Plug into outlet: Once the power cord is attached and the wires are secured inside the disposal's electrical box, the disposal is plugged into a Ground-Fault Circuit Interrupter (GFCI) outlet, typically located under the sink.
For All Installations:
7. Mount the disposal:
- If you still need to install the disposal to the sink, follow the manufacturer's instructions.
- Ensure it's securely mounted and aligned correctly.
8. Connect the disposal to the plumbing:
- Follow the manufacturer's instructions to connect the disposal to the sink's drain system.
- Ensure all plumbing connections are secure to prevent leaks.
9. Electrical connection to the power source:
- If your disposal is directly wired, connect the disposal's wiring to the home's electrical system, such as to the switch. Connect the black wire coming from the power source to one terminal on the switch. Connect the black wire leading to the disposal to the other terminal on the switch. If your switch has a grounding screw, ensure the ground wire is also connected to the switch.
- If your disposal plugs into an outlet under the sink, plug it in. Ensure the outlet is a GFCI (Ground-Fault Circuit Interrupter) for safety.
10. Test the installation:
- Once everything is connected, turn the power back on at the circuit breaker.
- Run water through the sink and turn on the disposal to ensure it operates correctly. Check for leaks under the sink.
11. Final check:
- Double-check all connections (electrical and plumbing) to ensure they are secure.
- Test the disposal with small amounts of food waste to ensure it's working properly.
How Many Amps For Garbage Disposal?
Most residential garbage disposals are designed to operate on a standard 120-volt, 15-amp circuit.
- A 1/3 horsepower (HP) disposal usually requires 4 to 5 amps.
- A 1/2 HP disposal typically needs around 5.5 to 6.5 amps.
- Larger disposals, like a 3/4 HP or 1 HP model, require 7 to 8 amps or slightly more.
Is a garbage disposal 120 or 240?
Garbage disposals in the United States and Canada residential settings are designed to operate on 120 volts.
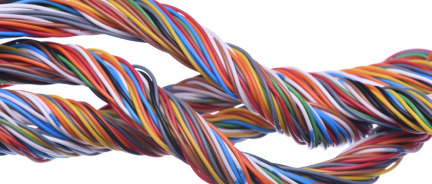
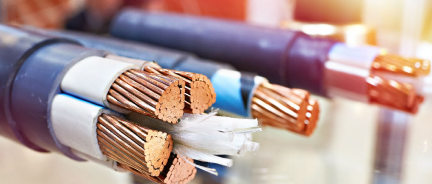
Cables For Garbage Disposals
For hardwiring garbage disposal, the most common choice is NM-B cable, as it is easy to work with interior wiring. If the circuit is 15 amps, the cable of choice is a 14-2 NM-B for direct power supply; if it is 20 amps, go for 12-2 NM-B for direct power supply. If you are using a switch-to-outlet configuration to split the power between the garbage disposal and dishwasher, go for cables with two live hot wires, like 14-3 NM-B or 12-3 NM-B.
You can alternatively use BX cable of same size in areas where wiring might be exposed to mechanical damage. For plug-in installations, use three-prong 120V appliance cords with a grounded plug.