How to Install a Light Fixture?
Whether you are remodeling or making a home upgrade before selling, installing a light fixture is a cost-effective and straightforward procedure. While many homeowners can do it themselves, there are cases where professional assistance is not just recommended, but necessary. In particular, professionals are required when dealing with complex wiring, structural changes, or outdated electrical systems.
This guide will walk you through the essential steps and considerations to ensure a safe and successful installation, highlighting when it’s best to call in a professional.

Installing Light Fixture: Step-By Step Guide
Safety should be your top priority when installing a light fixture:
- Ensure the electricity to the area is turned off at the circuit breaker to avoid electric shock.
- Wear safety goggles and gloves.
- Prepare your workspace by clearing the area around the fixture and laying down a drop cloth to catch debris.
- Read the manufacturer's instructions provided with the fixture.
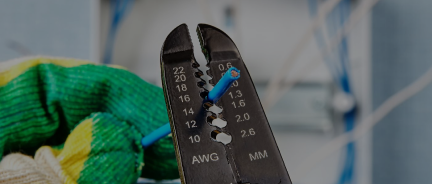
Gathering the necessary tools is also crucial. These tools include a screwdriver (flathead and Phillips), wire stripper, wire nuts, voltage tester, ladder, pliers, wire connectors, safety goggles, gloves, a drill with appropriate bits, and drywall anchors and screws if needed. Taking these safety precautions and having the right tools on hand will help ensure a smooth and secure installation.
Now, let’s break down the installation process:
Step 1: Turn Off the Power
Go to the circuit breaker and turn off the power to the area where you're installing the light fixture. Verify that there is no electricity flowing to the wires by using a voltage tester.
Step 2: Remove the Old Fixture
Carefully remove the old fixture by unscrewing it from the ceiling or wall. Once it's loose, disconnect the wires by unscrewing wire nuts and untwisting them.
Step 3: Assemble the New Fixture
Follow the manufacturer's instructions to assemble the new light fixture, which may include attaching the mounting bracket, canopy, and any additional components.
Step 4: Mount the Bracket
Attach the mounting bracket to the ceiling or wall, using screws and drywall anchors if necessary. Ensure it is securely fastened.
Step 5: Connect the Wires
Connect the fixture's wires to the house wiring using wire connectors. Typically, you'll connect the black or red wire to the fixture's black wire, the white wire to the fixture's white wire, and the green or bare wire to the fixture's green or bare wire.
Step 6: Secure the Fixture
Carefully tuck the connected wires into the electrical box and position the fixture against the ceiling or wall. Secure the fixture in place using screws provided in the installation kit.
Step 7: Attach the Canopy
If your fixture includes a canopy, attach it to cover the wiring and connections. Secure it with screws or clips as instructed.
Step 8: Install Light Bulbs
Insert the appropriate light bulbs as recommended by the manufacturer. Make sure they are the correct wattage for your fixture.
Step 9: Turn On the Power
Return to the circuit breaker and turn the power back on. Test the fixture by flipping the light switch. If it doesn't work, double-check the connections and ensure the circuit breaker is on.
Step 10: Final Inspection
Inspect the fixture to ensure it's level and securely attached. Check for any exposed wires or loose connections. If everything looks good, your installation is complete.
Step 11: Clean Up
Remove any debris or tools from the area. Dispose of old fixtures or packaging materials properly.
Notes on Installing Different Types Of Light Fixtures
Let's review how to install specific types of light fixtures, including hanging, ceiling, and bathroom fixtures to ensure a safe and successful installation.
How to Install a Hanging Light Fixture (Pendant Lights, Chandeliers, etc)?
- Check if the ceiling box or joist can support the weight of the fixtures. Hanging light fixtures can vary significantly in weight. Heavier fixtures, such as chandeliers, may put additional stress on the ceiling structure. If the existing support is insufficient, it could lead to structural damage or even the fixture falling.
- Adjust the length. Most hanging fixtures come with chains or wires that allow you to adjust their length. This step enables you to customize the fixture's height according to your room's dimensions and design preferences. Leaving some extra length for connections ensures that you have flexibility during the installation process.
- Install the canopy or plate against the ceiling. It hides the wiring and electrical connections and provides a clean and finished appearance for the fixture. Additionally, the canopy also offers support to the fixture by securing it to the ceiling.
How to Install a Ceiling Light Fixture?
- Provide a sturdy support. A robust ceiling box, preferably fan-rated, is crucial because ceiling fans, especially large ones, can be heavy. When the fan is in operation, it exerts a significant force, which can strain the ceiling structure. Without a sturdy support, there is a risk of the fan falling or causing structural damage, posing a safety hazard.
- Use a balancing kit. After installing the ceiling fan, it should run smoothly without wobbling. Wobbling can lead to noise, inefficient operation, and, in some cases, cause the fan to come loose from the ceiling. A well-balanced fan not only enhances its performance but also prevents potential damage or disruption.
- Install remote or switch setup. The choice between a remote control or wall switch for operating the fan is essential for user convenience and safety. Some fans come with remote controls, while others are hardwired to wall switches. Ensuring you've set up the appropriate controls means you can operate the fan with ease and according to your preferences. This step is crucial to make the fan user-friendly and functional.
Bathroom Light Fixtures
- Choose waterproof materials. Bathrooms are inherently moist environments, with a high level of humidity and the potential for splashes and moisture in the air. Therefore, it is crucial to ensure that the light fixtures installed in bathrooms are designed and rated for wet or damp locations. Using fixtures not designed for this environment can result in electrical hazards, corrosion, and even short circuits.
- Think about placement. Vanity lights are commonly used for grooming tasks, and their positioning directly impacts their effectiveness. Placing them above or alongside mirrors at the right height is crucial to ensure proper illumination of the face without casting shadows.
- Install the GFCI protection. Bathrooms contain numerous water sources, including sinks, showers, and bathtubs. This proximity to water increases the risk of electric shocks in the event of a fault or electrical issue. To enhance safety, it is vital to have bathroom circuits protected by Ground Fault Circuit Interrupters (GFCI). GFCIs are designed to quickly detect imbalances in electrical currents and shut off power if they sense a potential shock hazard.
Recessed Lighting (Can Lights):
- Ensure the proper placement. If the lights are not evenly spaced, some areas may be too bright while others are inadequately lit, leading to an imbalanced and less functional lighting scheme.
- Select IC-rated Fixtures. If the lights will be in contact with insulation, they must be rated for insulation contact (IC). Otherwise, they could pose a fire hazard.
- Ensure adequate depth. Inadequate depth can make installation difficult and may damage existing structures. Additionally, it can affect the proper positioning of the fixture within the ceiling, potentially leading to uneven or obstructed light distribution.
Wall Sconces
- Position sconces correctly. Wall sconces should be installed at a height where they can effectively illuminate and not cause glare. This often means placing them at eye level or slightly above.
- Run wall wiring. If there's no existing wiring, it'll need to be run through the wall to the desired height.
Track Lighting
- Secure track layout. Plan your track layout to ensure that the track pieces are securely connected.
- Attach lighting heads. Install the lighting heads onto the track. They can typically be moved and adjusted as needed.
- Establish power connection. Track lighting needs a specific connection to the power source, often at one end of the track.
How much does it cost to install a light fixture?
The cost of installing a light fixture can vary widely based on several factors, including the type of fixture, the complexity of the installation, and regional labor rates. Here's a brief guide on the cost of installing different types of light fixtures.
On average, the installation of a light fixture typically ranges from $100 to $650. The cost includes both the price of the fixture itself, which can range from $50 to $400 or more, and the labor involved, which can range from $50 to $250.
Different types of light fixtures come with their own price ranges. Ceiling lights, often the most affordable option, cost between $70 and $250 for both the fixture and installation. Recessed lights range from $130 to $300 per light, with pendant lights costing between $100 and $300. The installation of chandeliers can be more expensive, with a price range of $220 to $3,400, depending on their size and material.
Factors affecting the cost include the materials used for the fixture, its size and weight, ceiling height, labor costs, and any necessary structural adjustments. Electrical permits, ceiling painting, and drywall repair may also contribute to the overall cost. Electricians charge between $50 to $130 per hour, with additional costs for specific electrical work such as circuit breaker installation or panel upgrades. Permit costs vary but can add $50 to $200, along with potential inspection fees.
The age of the house can influence the cost, especially in older homes where wiring, outlets, or circuit breakers may need updating.
When should a professional install a light fixture?
A professional electrician should be called in to install a light fixture in the following instances:
- Heavy or Large Fixtures. Heavy or large fixtures, such as chandeliers or substantial pendant lights, need professional electrician installation because of the potential structural strain on ceilings or walls. Professionals evaluate the specific ceiling type to ensure appropriate mounting hardware and precise installation to distribute weight safely. They manage intricate wiring and electrical work that comply with safety standards and local codes.
- Modifications to Your Home's Electrical System. When you need to add new circuits, reroute wires, or upgrade the electrical panel, the expertise of a professional electrician is essential. For example, new circuits might be necessary to handle the increased load from additional fixtures, which involves calculating the proper amperage and installing the appropriate wiring and circuit breakers.
- Old or Outdated Wiring. Homes with old or damaged wiring can present significant safety risks, as outdated systems may not meet current electrical standards and could be prone to issues like shorts, overloads, or electrical fires. Professional electricians are adept at evaluating the condition of the existing wiring, identifying and addressing any issues, and making essential repairs or replacements to bring the electrical system up to code.
- New Switches. When adding a new light fixture or switch, particularly in more intricate configurations like 3-way or 4-way switches, the involvement of an electrician is highly recommended. These multi-switch setups demand a thorough understanding of wiring complexities to ensure the correct functionality and prevent issues like flickering lights or non-responsive switches.
- Permit Requirements. When local building codes mandate permits for electrical work, professional electricians know how to handle it. They have the expertise to navigate the permit application process and ensure all necessary paperwork is filed accurately and in compliance with local regulations. Furthermore, electricians perform the work in adherence to the specified code.
- Safety Concerns. Light fixture installations in spaces with unique safety concerns or environmental challenges demand professional expertise. High-ceiling areas require specialized equipment and training to work at heights safely. Wet or damp locations demand fixtures designed for moisture resistance and a professional's knowledge to prevent electrical issues in such conditions.
- Complex Installations. Track and recessed lighting require precise wiring, sometimes involving modifications to existing ceilings or walls. Ceiling fans with remote controls involve multiple connections and meticulous mounting to guarantee safety and functionality.
- License Requirements. In many states, such as California, New York, and Texas, any person that performs electrical work, should have a locally issued license. Whether you need to install a new system or make minor changes, a licensed electrician is required.


