Garrie AI: Your Cable Guide


What Is Cable or Wire Splicing? Methods and Step-by-Step Guide

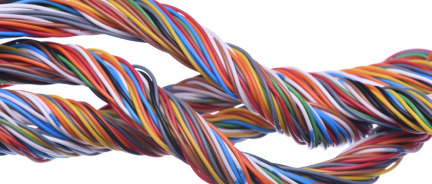
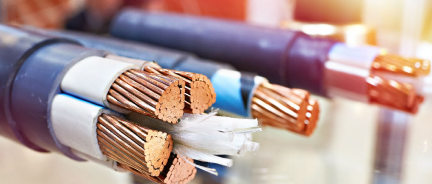
When managing an electrical project, you will often find a need to splice electrical cables instead of buying new ones. Cable or wire splicing is the process of connecting the endpoints of two or more cable conductors. During the process, wires of different lengths are joined together while their original characteristics remain unchanged. Splices can be made on electrical and fiber optic cables.
The primary purpose of a splice is to let the joined wires carry current. A splice lets you connect damaged cables instead of installing new ones, which can be a cheaper alternative to buying a full new run. The work requires knowledge and some practice, so it is not a task for anyone without basic electrical training.
A splice can also extend a cable to reach a circuit. Coaxial cables in a house are often joined when they do not reach the source or the TV set, forming a single run. Cables are also spliced to extend fixture boxes or to branch a circuit in several directions. The technique helps when a fixture moves or a wall opens during a remodel.
General Considerations Regarding Cable Splicing
-
Cables that are joined together should have the same AWG size and an identical number of conductors.
-
As a rule, cable splicing does not lead to changes in voltage.
-
For safety, always turn off the power to the circuit when performing cable splicing.
-
You can safely splice three or more wires as long as you follow basic instructions. Pigtail is the best type of splicing when connecting three or more wires because it prevents one splice from remaining straight while the others are twisted around it. When this occurs, the splicing might fail because the straight wire can be easily pulled out of the construction.
-
Do not use tape alone to splice wires without twist-on wire caps. This procedure is not approved by UL, and the wires risk losing their original characteristics, such as flame retardancy and moisture resistance.
-
Do not leave splices hanging alone in walls or ceilings, as it is not safe. Instead, keep the splices in a box.
-
When in doubt, rely on a professional to perform cable splicing, as it is a complex electrical work.
Types of Wire Splices
There is a variety of popular electrical splices and joints used in cable splicing, including pigtails, Y-splices, knotted tabs, aerial tabs, cross joints, and duplex cross joints. While pigtail is the most common type of splicing, you should educate yourself about these types to find which one is suitable for you. For instance, y-splices are performed on small cables with flexible strands.
Electricians use several splice patterns, each suited to a different job. The five below cover most field work on solid and stranded conductors.
-
A Western Union splice hooks two solid wires and twists them into an in-line joint that holds under tension. Overhead runs, antenna leads, and fence wire use it.
-
A pigtail, also called a rattail, gathers conductors from one side, twists the ends together, and caps them with a wire nut. Junction boxes, receptacle legs, and switch legs rely on it.
-
A lineman's splice resembles the Western Union and adds a tighter double wrap on each leg for higher mechanical strength. Utility line work and service drops use it.
-
A tap, or T-splice, branches a conductor off a continuous run without cutting the run. Branch taps and grounding or bonding jumpers use it.
-
An underwriter's knot ties two cord conductors at the entry of a plug or fixture. The knot holds tension off the terminal screws.

Wire Splicing by Gauge
Wire size decides the splice method. Small conductors can be spliced with just twist-on connectors, while large conductors need mechanical or compression hardware rated for the cross-section.
For 14, 12 AWG, and 10 AWG branch wiring, a twist-on wire nut or a lever connector is a reliable splicing tool. From 8 AWG up, the twist-on wire is too stiff, so use a set-screw connector, split-bolt, or crimp sleeves. Service conductors at 1/0 AWG and larger call for compression connectors or split-bolts sized to the conductor.
Reliable splices use conductors of the same gauge and material. Match copper to copper and aluminium to aluminium, and use an AL/CU rated connector when the metals are to be joined. Shop copper building wire and aluminum URD when a run needs replacement instead os splicing.
How To Choose a Wire Connector For Splicing
The connector follows the conductor count and the wire size. Three families cover most splices.
-
Twist-on wire nuts join two to six conductors in a box. The colour indicates the fill range, but codes vary by manufacturer, so match the count and gauge to the package rather than the colour alone. Wire nuts cover 22 AWG through 10 AWG and come pre-insulated.
-
Lever connectors, sometimes called push-in or Wago-style, seat solid or stranded conductors in separate ports. A two, three, or five-port body handles the matching conductor count. Lever connectors cover 28 AWG through 10 AWG and are pre-insulated.
-
Crimp and butt connectors join conductors end-to-end using a compression barrel. A ratcheting crimp tool seats the barrel, and a pull test confirms the hold. They are usually used in automotive and stranded wire
-
Split-bolts and set-screw connectors handle the large conductors that twist-on caps cannot. A split-bolt clamps conductors between a hinged body and a nut, and a set-screw connector holds them in a barrel with a torqued bolt. Both cover 6 AWG through 4/0 and need tape or a cover after installation, since neither is pre-insulated.
How To Splice A Wire?
Once all safety steps are met, it is time to splice. As a rule, make the splice inside a junction box.
For basic cable splicing, you will need the following tools: an electrical cable ripper, a wire stripper, a hammer, a screwdriver, working gloves, pliers, a cordless drill, and an extender for it. You will also need to gather materials for splicing, including a jbox, cable clamps for it, UL-recommended wire connectors, woodscrews, and a grounding pigtail.
Strip method
-
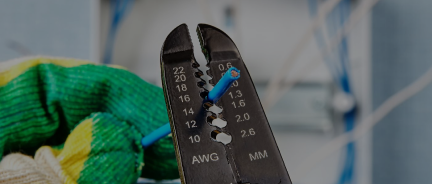
Remove one inch of insulation from each wire. Use a wire stripper one or two sizes smaller than the conductor.
-
Slide a three-inch shrink tube onto one wire before you join them, so it is ready to seal the finished joint.
-
Twist the bare conductors together, then cover the joint with the shrink tube and heat it.
Twist-on wire cap method
-
Press the wire ends together so they touch tightly.
-
Thread the twist-on cap onto the wires clockwise.
-
Pull each wire to check that it stays. Tighten the cap if a wire slips.
-
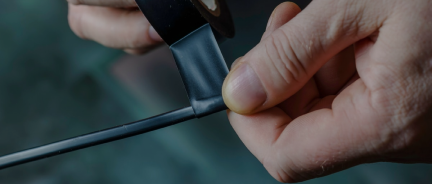
Wrap the base of the cap and the wires with electrical tape. A rubber EPR tape suits this purpose.
How To Crimp Wires
A crimp joins a conductor to a terminal or to another conductor by compressing a metal barrel around the bare strands. A crimp requires no heat or solder and holds well on stranded wire, which makes it common in automotive, panel, and low-voltage work.
Common crimp connectors include:
-
A butt connector joins two conductors end-to-end inside a barrel that is open at both ends.
-
Ring and spade terminals land a conductor on a stud or screw terminal.
-
A bootlace ferrule caps a stranded conductor so it seats cleanly in a set-screw terminal.
-
An insulated barrel carries a color that marks its gauge range, while an uninsulated barrel takes a separate sleeve.
To crimp a connector:
-
Match the connector to the wire gauge. The barrel color or stamp marks the range.
-
Strip the conductor to the length of the barrel, usually about a quarter inch.
-
Insert the strands fully so no bare copper shows past the insulation grip.
-
Compress the barrel with a ratcheting crimp tool sized to the connector. The ratchet releases only after full compression.
-
Pull the conductor to confirm the crimp holds.
-
For a wet or buried joint, use a heat-shrink butt connector and shrink the adhesive sleeve with a heat gun.
Always match the crimp tool to the connector.
Waterproof and Underground Wire Splices
Three options are available for splicing in underground conditions:
-
Heat-shrink butt connectors seal the joint with an adhesive-lined sleeve that closes under heat. Landscape lighting, pumps, and outdoor fixtures use them.
-
Gel-filled connectors surround the conductors with a waterproof gel and suit low-voltage and irrigation runs.
-
Resin splice kits pour a two-part compound around the joint that cures into a solid, waterproof block for direct-buried power and utility work.
Under the NEC, direct-buried conductors may be spliced without a box when the splice uses materials listed for burial. See the code section below. For buried runs, review our direct burial wire guides and landscape lighting cable.
NEC Rules for Wire Splices
Here is what NEC says about wire splicing
-
Every splice in permanent wiring belongs inside a box, conduit body, or listed fitting, and that enclosure stays accessible. Leave at least six inches of free conductor at each box for the splice.
-
Keep splices out of the raceway itself, respect the box fill limit for the wire size, and arrange the grounds so that removal of a device does not break the ground path.
-
Use listed connectors, insulate the joint to the level of the conductor, and torque each connection to the manufacturer value.
-
Direct-buried conductors are the one common exception, since they may be spliced without a box when the splice uses listed burial-rated materials.

Types of Fiber Optic Splicing
The splicing of fibre-optic cables differs from that of regular cables. While regular electrical cables' splicing is always mechanical, fiber optic cables can be joined using two methods: mechanical splicing and fusion splicing.
You would need a separate set of tools for fiber optic splicing, including fiber strippers, crimp tools, tubing cutters, Kevlar scissors, needle-nose pliers, fiber scribes, tweezers, and a jacket stripper.
Fusion Splicing
A fusion splicer joins the two fibers with an electrical arc that fuses the ends. The result is transparent and non-reflective. Fusion costs more than the mechanical method and delivers higher quality and a longer service life, with less signal reduction and transmission loss. A skilled technician runs the machine. Typical light loss is around 0.1 dB, and insertion loss is lower still.
Mechanical Splicing
Mechanical splicing joins fibers by hand with tools and no powered machine. An index-matching gel aligns the fiber ends inside a splice about 6 cm long, and a cover speeds the work. The method is cheaper and faster, though reflection runs higher than with fusion. Insertion loss is usually under 0.5 dB, and splice loss is around 0.3 dB.
Frequently Asked Questions
Can you splice wires of different gauges?
It is better to avoid it. A joint between two gauges creates an ampacity mismatch that can overload the smaller conductor. When a mixed-gauge splice cannot be avoided, size the connector and the overcurrent protection to the smaller conductor.
How do you splice three or more wires together?
Use a pigtail. Strip each conductor, hold the ends together, and twist a wire nut over them in a clockwise direction until the jackets draw up into the cap. A pigtail keeps every conductor inside the twist, so none pulls straight and works loose.
How do you crimp wires?
Match a crimp connector to the wire gauge, strip the conductor to the barrel length, and insert the strands fully. Compress the barrel with a ratcheting crimp tool, then confirm the hold with a pull test.
How do you fix a spliced wire?
Cut out the failed joint, strip fresh insulation on each conductor, and remake the splice with a rated connector inside an accessible box. A loose wire nut can be reseated, though a corroded or overheated joint requires removing the damaged section and installing a new connector.
How do you splice wire underground?
Use a connector listed for direct burial, such as a heat-shrink, gel-filled, or resin-kit splice. The NEC permits a direct-buried splice without a box when the materials are listed for the location.
How do you make a waterproof wire splice?
Join the conductors with a crimp or twist connector, then seal the joint. A heat-shrink butt connector with an adhesive liner, a gel-filled connector, or a resin kit each produce a waterproof splice.
Do wire splices need a junction box?
Yes, in permanent indoor and most outdoor wiring. The NEC requires an accessible box or listed fitting at the splice. Direct-buried conductors with burial-rated connectors are the main exception.
How do you splice 12 or 14 gauge wire?
For 14 and 12 AWG, a twist-on wire nut or a lever connector makes a solid joint. Strip about three-quarters of an inch of insulation, match the conductors, and seat the connector. Confirm the hold with a gentle pull.
How do you splice wire rope?
Wire rope uses a mechanical splice rather than an electrical one. An eye splice or long splice tucks the strands back into the rope, and a swaged sleeve or cable clamp secures the load. An electrical splice, by contrast, joins conductors to carry current.