Garrie AI: Your Cable Guide


How to Wire a Light Switch?
Wiring a single-pole light switch is one of the most straightforward and essential skills in residential electrical work.
This guide walks you through a standard light switch setup using NM-B cable, the most common type used in modern indoor installations. We’ll cover cable types, wire color meanings, step-by-step instructions, and common mistakes, supported by a detailed visual diagram.
What Type of Cable Do You Need?
NM-B (Non-Metallic Sheathed) cable, commonly referred to as Romex, is used in most residential circuits. It contains hot, neutral, and ground wires in one PVC jacket.
Here’s what you’ll typically use:
-
14/2 NM-B Cable
-
• Used in 15-amp circuits
-
• Contains black (hot), white (neutral), and bare copper (ground)
-
12/2 NM-B Cable
-
• Used in 20-amp circuits
-
• Slightly thicker conductors to handle higher current
-
14/3 or 12/3 NM-B Cable
-
• Used when a red traveller wire is needed (e.g. 3-way switches)
-
• Includes black, white, red, and ground
Use 14 AWG wire with 15A breakers and 12 AWG wire with 20A breakers. Never mix wire gauges on the same circuit.

Understanding the Wire Colours
Here are the standard U.S. wire colour codes you'll see inside NM-B cable:
-
Black (Hot): Brings power from the source to the switch
-
Black or Red (Switched Hot): Returns power from the switch to the light fixture
-
White (Neutral): Carries the return current back to the panel (not connected to the switch)
-
Bare Copper or Green (Ground): Provides a safe fault path to ground
Note that the switch controls only the hot wire. The neutral wire bypasses the switch and goes straight to the light.
Tools & Materials Checklist
Before starting, make sure you have:
-
NM-B cable (14/2 or 12/2)
-
Single-pole light switch
-
Light fixture
-
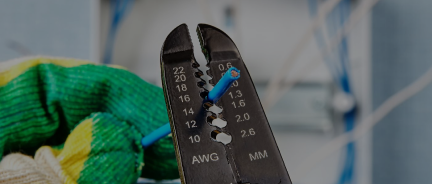
Wire stripper
-
Screwdrivers
-
Voltage tester
-
Wire connectors (twist-on or push-in)
-
Electrical boxes
-
Faceplate
Step-by-Step Instructions
Always turn off the power at the breaker panel before beginning work. Use a voltage tester to confirm no current is present.
Step 1: Run Cables
-
Run one NM-B cable from your power source (breaker or outlet) to the switch box
-
Run another cable from the switch box to the light fixture
Step 2: Grounding
-
Twist all bare copper ground wires together in each box
-
Connect a pigtail from the ground bundle to the switch’s green screw
-
At the fixture, ground the mounting strap or green terminal
Step 3: Connect the Switch
-
Connect the black hot wire from the power source to one terminal of the switch
-
Connect the black (or red) wire going to the fixture to the other switch terminal
Step 4: Connect the Neutral Wires
-
The white wires from both cables should bypass the switch
-
Join them together with a wire connector inside the switch box
Step 5: Wire the Fixture
-
Connect the switched hot wire (black or red) to the fixture’s black wire
-
Connect the neutral wire (white) to the fixture’s white wire
-
Attach the ground wire to the fixture’s grounding screw or wire
Step 6: Secure Everything
-
Gently fold wires into the boxes without damaging the insulation
-
Mount the switch and fixture
-
Attach the faceplate
Step 7: Turn Power Back On and Test
-
Flip the breaker back on
-
Test the switch: the light should turn on and off smoothly
Visual Recap
The diagram above shows the flow of power through a single-pole switch setup using an NM-B cable. Here's how it breaks down:
-
Power enters the switch box
-
The hot (black) wire connects to one terminal of the switch
-
The switched hot (black or red) runs to the fixture
-
The neutral (white) bypasses the switch and connects to the fixture directly
-
The ground wires are connected throughout for safety
This is the standard “switch loop” configuration used in most lighting circuits.
Common Mistakes to Avoid
-
Mixing up hot and neutral wires
-
Failing to ground all components
-
Overcrowding the box. Follow box fill capacity requirements to avoid overheating
-
Using the wrong wire gauge
When to Call an Electrician
You should contact a licensed professional if:
-
Your home uses older wiring without a ground
-
You’re dealing with 3-way or dimmer switches
-
You’re unsure of code compliance in your area
Nassau National Cable stocks 14/2, 12/2, 14/3, and 12/3 NM-B copper building wire for residential and commercial use.
-
UL-listed
-
Flame-retardant PVC jacket
-
600V rated
-
Fast shipping available