Garrie AI: Your Cable Guide


How to Wire a 3-Phase Electric Motor: A Diagram
Knowing how to wire a 3-phase motor correctly depends on two things: reading the nameplate and understanding what Star and Delta configurations mean. This guide covers both. It also covers sizing electrical wire for a 3-phase motor, preparing cable ends, and the protection the circuit needs beyond the breaker.
The 3-phase motor wiring diagram at the top of this page shows the IEC terminal notation, Star and Delta schematics, and the physical terminal box layout side by side. Use it as a quick reference while working through the steps below.
What Is a 3-Phase Motor?
A three-phase motor is an AC induction motor powered by three alternating currents offset by 120 degrees. When three-phase current flows through the stator windings, it creates a rotating magnetic field without any mechanical assistance. The rotor, which has no external electrical connection, follows that field through electromagnetic induction, causing the shaft to rotate.
Unlike single-phase motors, which require starting components, or DC motors, which use brushes and commutators, three-phase induction motors operate with a simpler design and fewer failure points. Three-phase power also delivers smooth, constant torque without the ripple associated with single-phase systems, making these motors more efficient for continuous operation.
That is why three-phase motors are widely used in industrial equipment such as pumps, compressors, conveyors, fans, mixers, HVAC systems, and machine tools that require reliable continuous power. They range from small pump motors to large industrial drive systems, but the wiring principle remains the same. Wiring them correctly requires understanding two configurations: Star and Delta.

What Star and Delta Actually Mean
Both configurations refer to how the three internal motor windings connect to each other and to the supply. The motor hardware is identical either way. What changes is the voltage: for example, on a 400V three-phase system, each winding in a Star (Wye) connection receives about 230V, while in a Delta connection each winding receives the full 400V.
In Star (Y), the three link-end terminals — U2, V2, and W2 — are joined at a single point. That point is the neutral, or star point. Each winding spans from a supply phase to the neutral. Because the winding sits between a phase and neutral rather than between two phases, it sees only 58% of the line-to-line voltage (line voltage divided by √3, roughly 231V on a 400V supply). Star is the higher-voltage configuration on the nameplate.
In Delta (Δ), there is no shared neutral. Each winding connects directly across two supply phases. The full line-to-line voltage appears across every winding — 400V on a 400V supply. Delta delivers higher torque but draws significantly higher inrush current at startup. It is the lower-voltage configuration on the nameplate.
This distinction also explains how Star-Delta (Y-Δ) soft starters work. They start the motor wired in Star to limit inrush current to roughly one-third of its Delta value, then switch to Delta under a time delay once the motor approaches running speed.
Read the Nameplate Before Wiring Anything
The nameplate on every three-phase motor lists two voltages. The format varies but follows the same logic:
-
Y 380–420 V / D 220–240 V — Star range above, Delta range below
-
Y 660–720 V / D 380–420 V — different winding, same principle
The higher voltage is always Star. The lower is always Delta. Match your supply to one of those ranges before selecting a configuration.
A 400V supply and a nameplate reading Y 380–420 V / D 220–240 V means Star. The same 400V supply with a nameplate reading Y 660–720 V / D 380–420 V means Delta. The wrong configuration at startup results in either a severely undervolted or overvolted winding.
The nameplate also lists the full-load amperage (FLA), which must be documented, as every downstream sizing decision depends on it: the branch-circuit electrical wire, the overload relay, and the disconnect.
The Terminal Box Layout
Open the terminal box and you will find six terminals in two rows:
-
Top row: U1 — V1 — W1 (supply ends, where phase conductors connect)
-
Bottom row: W2 — U2 — V2 (link ends)
The bottom row is typically arranged as W2–U2–V2 under IEC conventions to simplify Delta jumper placement.
NEMA motors use T1 through T6 instead: T1=U1, T2=V1, T3=W1, T4=U2, T5=V2, T6=W2. Many motors sold in North America include both markings.
Star (Y) Wiring
Connect the three supply phase conductors to the top row:
-
L1 → U1
-
L2 → V1
-
L3 → W1
Then install a star link bar across the bottom row — W2, U2, and V2 — to join all three link ends at the neutral point. No phase conductor connects to the bottom row. Confirm this before closing the terminal box cover.
Delta (Δ) Wiring
Delta requires a short jumper bridge in each column:
-
U1 bridged to W2 → connect L1 to this junction
-
V1 bridged to U2 → connect L2 to this junction
-
W1 bridged to V2 → connect L3 to this junction
Fit three short jumper links — one per column. Confirm there is no neutral bar across the bottom row. In Delta, each bottom terminal forms part of its own phase junction.
How to Size Electrical Wire for a 3-Phase Motor
Branch circuit conductors feeding a single motor must have an ampacity of at least 125% of the motor's nameplate FLA per NEC 430.22. This is the starting point before any derating.
For a motor with 15A FLA: 15 × 1.25 = 18.75A minimum. A #12 AWG THHN/THWN-2 conductor rated 20A at 75°C in conduit satisfies that requirement per NEC Table 310.16. For a 30A FLA motor, minimum conductor ampacity is 37.5A — #8 AWG at 50A provides the required margin.
Apply derating if conduit fill or ambient temperature requires it. More than three current-carrying conductors in a conduit triggers a fill derating factor per NEC 310.15(C). Installations above 30°C require temperature correction from the same table. Use the 75°C column for conductor ampacity with THHN/THWN-2 unless every termination in the circuit is rated for 90°C connections. Most motor terminals and contactors are not.
AWG reference for common motor FLAs (THHN/THWN-2, 75°C column, no derating):
10A motor FLA → 12.5A minimum ampacity → #14 AWG
15A motor FLA → 18.75A minimum ampacity → #12 AWG
20A motor FLA → 25A minimum ampacity → #10 AWG
28A motor FLA → 35A minimum ampacity → #8 AWG
40A motor FLA → 50A minimum ampacity → #8 AWG
52A motor FLA → 65A minimum ampacity → #6 AWG
Size the equipment grounding conductor per NEC Table 250.122 based on the overcurrent device rating, not the conductor ampacity.
The Supply Conductors: What Each One Does
A three-phase motor branch circuit has four conductors: three phase conductors and one equipment grounding conductor.
L1, L2, L3 — the phase conductors. These carry the three alternating currents that produce the rotating magnetic field in the motor stator. They connect to U1, V1, and W1 in the terminal box. Each conductor should be sized at 125% of the motor's FLA as described above. THHN/THWN-2 is the standard electrical wire for this application. It is rated 600V, dual-rated for wet and dry locations, and suitable for installation in EMT, rigid conduit, or wireways.
PE — the equipment grounding conductor. This conductor bonds the motor frame to the electrical system ground. It carries fault current in the event of insulation failure, allowing the overcurrent device to trip before the frame becomes a shock hazard. Connect it to the marked PE or ground terminal on the motor housing and to the corresponding grounding terminal at the disconnect or motor control center. Per NEC 430.12, motor terminal housings must accommodate this connection. Do not skip it.
There is no neutral conductor in a standard three-phase motor circuit. The motor does not require a neutral to operate. The star configuration creates an internal neutral point at the joined U2, V2, and W2 terminals, but this point is not connected back to the supply neutral in a standard motor installation.
IEC Cable Colors
IEC 60446 defines the following conductor colors for three-phase systems:
-
L1 → Brown
-
L2 → Black
-
L3 → Grey
-
Neutral (N) → Blue
-
Protective Earth (PE) → Green/Yellow
North American systems commonly use black, red, and blue for phases, with green for ground.
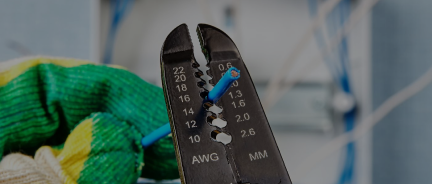
Preparing the Cable Ends
Cable preparation affects connection reliability as much as conductor selection.
Strip insulation to the correct length for the terminal type. For screw-type terminal blocks, expose just enough conductor to make full contact inside the terminal — typically 10 to 12mm. For ring or fork lugs, strip to the barrel length of the lug.
For stranded conductors terminating in screw-type terminal blocks, crimp ferrules onto each stripped end before insertion. A bare stranded end under a screw terminal tends to spread, leaving some strands outside the clamping zone and increasing contact resistance. Ferrules eliminate this. Use the ferrule size matched to the conductor cross-section and a ratcheting crimp tool — not pliers.
Tug each ferrule after crimping before inserting it into the terminal. Torque all terminal screws to the value specified on the terminal block or motor connection label. Under-torqued connections loosen under motor vibration. A calibrated torque screwdriver is the correct tool.
Motor Protection: Why a Breaker Is Not Enough
Branch circuit breakers and fuses protect the electrical wire from fault current. They do not protect the motor windings from thermal overload.
A motor running at 115% of rated current will not trip a properly sized fuse. It will destroy its winding insulation over hours or days. The device that prevents this is an overload relay (OLR) mounted inside a motor starter. NEC 430.32 requires overload protection set at no more than 125% of nameplate FLA for motors with a 1.15 service factor, or 115% for 1.0 SF motors.
Install a full-voltage non-reversing (FVNR) motor starter with the OLR set to nameplate FLA—a contactor and OLR combination instead of just a disconnect and fuses. There is a correct protection package for any continuously running three-phase motor.
Pre-Energization Checks
Before closing the disconnect:
-
Insulation resistance test. Apply 500V DC with a megohmmeter between each winding and ground, and between winding pairs. A reading above 1 MΩ is acceptable for operation. Below 1 MΩ means moisture or damaged insulation — do not energize. Dry the motor at 90°C and retest. New motors typically read 100 MΩ or higher.
-
Winding continuity. Check continuity across U1–U2, V1–V2, and W1–W2 with a multimeter. An open reading indicates a broken winding.
-
Configuration check. Confirm the link arrangement in the terminal box — star bar or column jumpers — matches the nameplate voltage for your supply.
-
Ground continuity. Verify the PE conductor makes a continuous low-resistance path from the motor frame to the panel ground.
-
Visual inspection. Check that all terminal screws are tight, no conductors are pinched under the cover, and the conduit entry is secure.
Reversing Rotation
To reverse the direction of shaft rotation, swap any two of the three phase conductors at the motor disconnect or contactor — swapping L1 and L2 is the standard approach. This reverses the sequence of the rotating magnetic field and with it the direction of rotor rotation. Do not swap conductors inside the motor terminal box or rewire the winding ends.
Run the motor uncoupled before connecting the load. Observe shaft direction. If rotation is incorrect, power down, lock out, swap two phase conductors, and verify again before coupling.
Common Mistakes
-
Misreading the nameplate. The higher voltage is Star; the lower is Delta. Wiring the wrong configuration can damage the windings immediately.
-
Assuming terminal order. Some motors use U2–V2–W2 on the bottom row, which changes Delta jumper placement. Follow the markings exactly.
-
Skipping the overload relay. Fuses protect the cable; the overload relay protects the motor.
-
Using unferruled stranded conductors. Loose strands can fail under vibration.
-
Skipping insulation resistance testing before energizing the motor.
Electrical Wire for Motor Branch Circuits
Nassau National Cable stocks THHN/THWN-2 building wire in common motor circuit sizes, including #14, #12, #10, #8, and #6 AWG, available by the foot or full reel and in standard phase colours. For conduit-free runs, we also carry Type MC cable suited to motor feed applications.
Need help sizing wire for a specific motor FLA, or working through derating for conduit fill and ambient temperature? Contact our team.